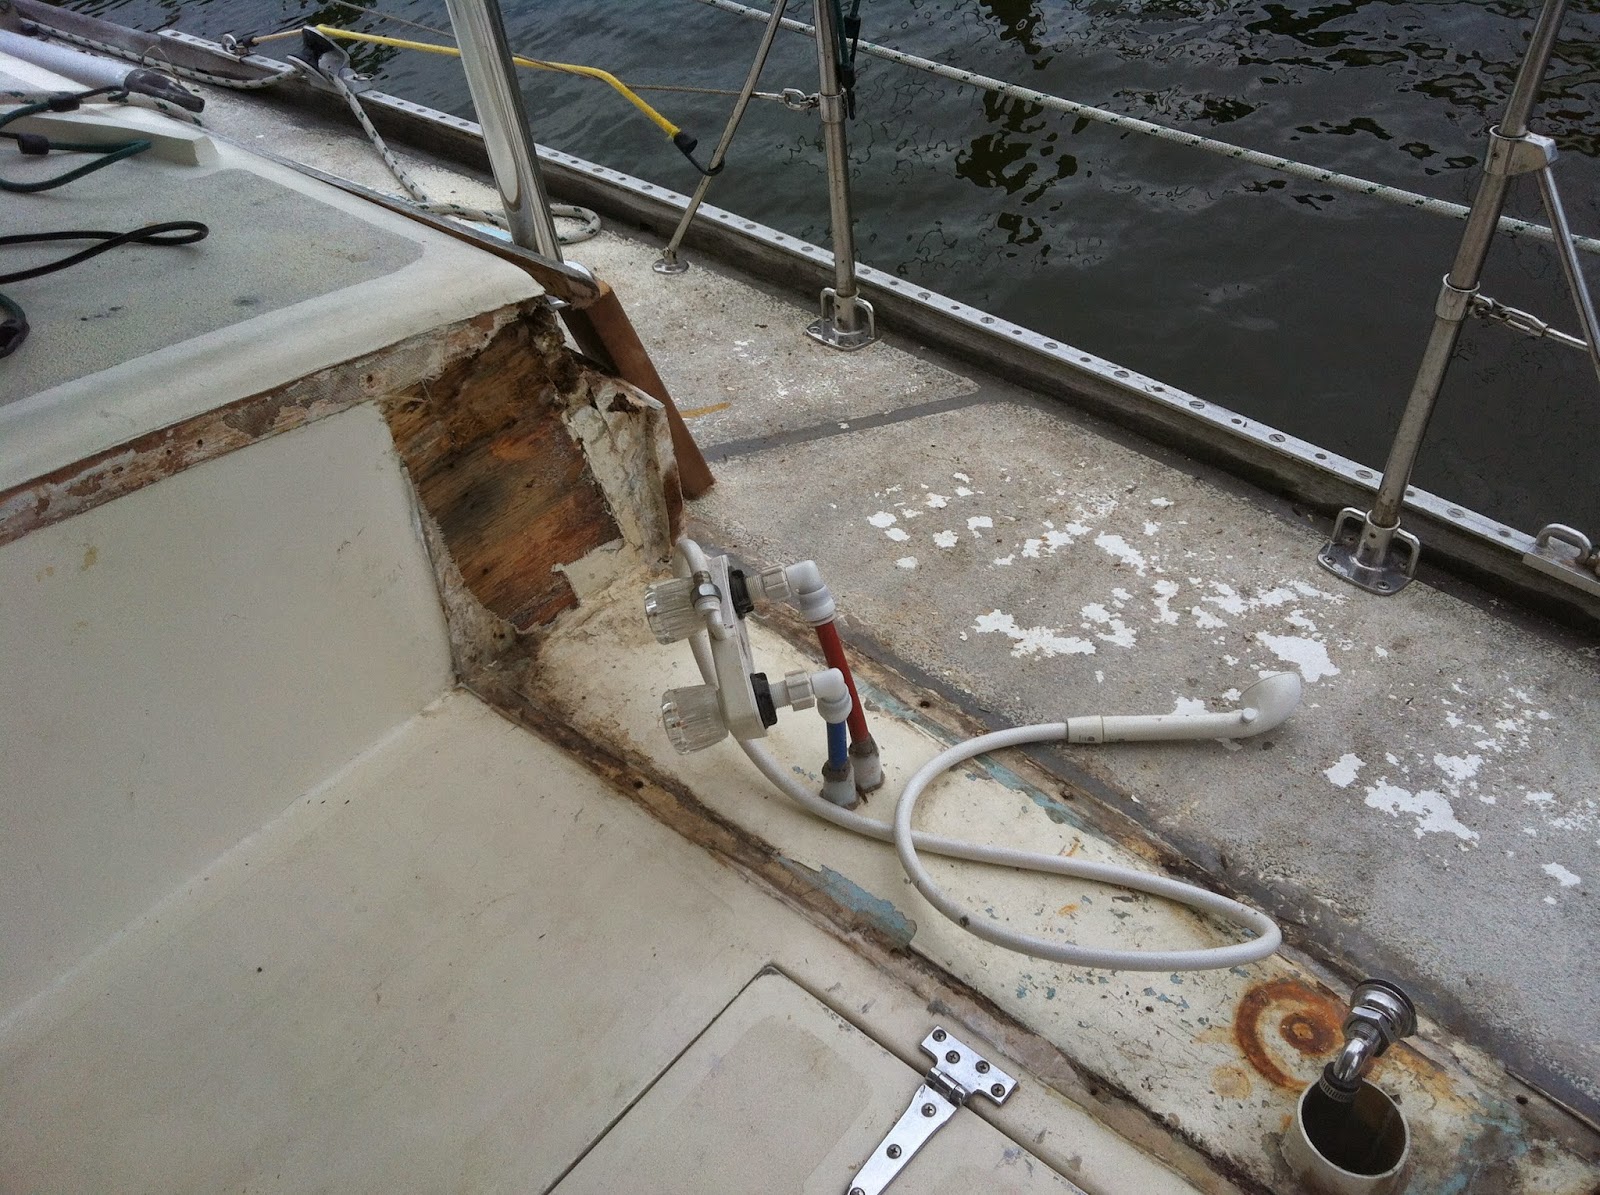
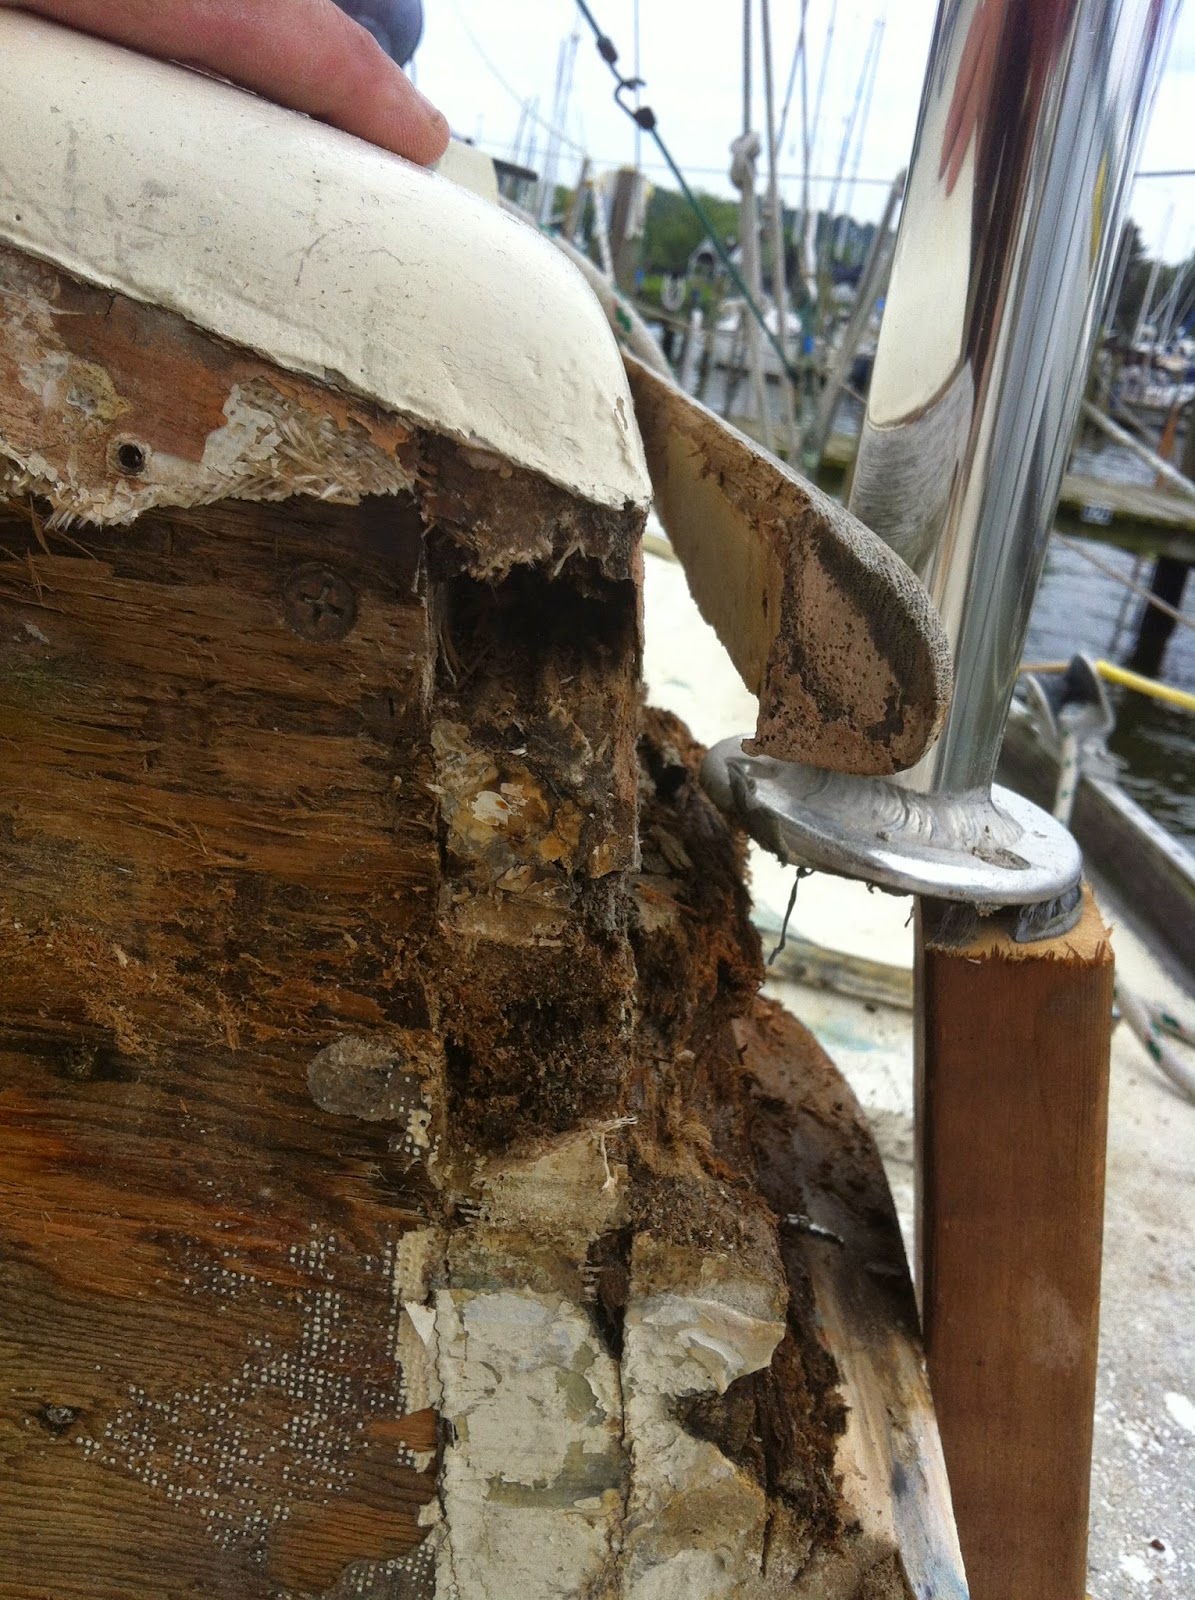
She got started right away, cutting into the plywood bulkhead and roof until she found rot free wood.
 |
 |
 |
 |
I understood that it is common to use a scarf joint to join the repairs. An 8:1 ratio is generally considered adequate, a 12:1 is good. - 12:1 meaning that the scarf would be 12" long in a 1" thick board.

A lap joint is a type of scarf joint - A joint made by placing one piece partly over another and bonding the overlapped portions. Something like this:

Our shipwright said she would apply a "ships lap" to repair the bulkhead, the roof and the starboard side. The bullkhead is 3/4" grade AA marine fir plywood. She will cut out the bad area, then route out 1/2 the thickness in an area around the cutout. One layer of new plywood 3/8" thick will go in the hole, a second layer 3/8" thick will fit in the routed out area and be epoxied to the smaller piece, and to the routed out original piece. She routed a border of 4" - so effectively 4:1. The roof is also plywood - actually 4 layers of 1/4 thick. The side is solid mahogany 1-1/4" thick and has 3/8" rods running inside its thickness. She will use a 1/2 board, and a 3/4" board routed out for the rod and lap these two boards together and to the routed out edge of the remaining side. This seems like a reasonable approach - the purpose of the scarf joint is to provide a large surface area to bond. The lap joint should accomplish this well.
 |
| .. |
On the roof, the area that has not been routed will be cut out leaving a hole, and a piece of 1/2" ply will be cut to fit the hole.
A second piece of 1/2" ply will be cut to fit the routed out area, and
will be epoxied to the 1st piece, and to the routed area of the existing roof.
By the end of the day, the bulkhead and 1st layer of the roof repair was roughed in. Tomorrow she will mill the mahogany corner posts, sides, and trim pieces at her shop, then we will meet again Thursday.
I gotta tell ya - it was a bit scary. She works very fast - and appears to know her trade. There is a tradeoff between cost (time spent on the job) and quality. I'm inexperienced so move slowly. Very slowly. My time is also free.... so I am willing to invest a bit more time into (trying) to do my best job. I worried about her fast approach - and when she ran out of epoxy today - she only came with 1 tube of Six-10, I worried a bit more. I also expected her to do something in the way of treating the remaining areas around the cut outs - ie penetrating epoxy on the deck beam at the bulkhead, or sealing the edges and end grain of cut pieces. She didnt. I mentioned it and she said the epoxy (six-10) would seal the cut edges. The routing was sloppy - she said we would fill it with Marinetex putty. OK. So... we'll see how this repair goes before I commit to her for the rest of the work.